Hey there, tech-savvy friend! Let’s dive straight into something pretty darn cool—remotely accessing your Raspberry Pi’s remote desktop from a Windows 10 machine. Whether you're a hobbyist or a professional, this setup can save you loads of time and effort. Imagine being able to control your Pi from anywhere, as long as you have an internet connection. Sounds awesome, right? Well, buckle up because we’re about to break it down step by step!
Let's talk about the power of remote access. With the right tools and a bit of know-how, you can transform your Raspberry Pi into a fully functional remote workstation. This guide will walk you through the process of setting up remote desktop capabilities so you can access your Pi’s desktop environment from your Windows 10 computer. No more fiddling with cables or carrying your Pi around—just pure convenience.
So, why should you care about remotely accessing Raspberry Pi remote desktop on Windows 10? Well, it’s not just about convenience. It’s also about flexibility, efficiency, and the ability to work on projects from anywhere. Whether you're managing a home server, running scripts, or even controlling IoT devices, remote access opens up endless possibilities. Let’s get started!
Read also:Norah Jones Dont Know Why The Journey Behind The Melodic Masterpiece
What You Need Before You Begin
Before we jump into the nitty-gritty, it’s important to make sure you’ve got everything you need. Here’s a quick checklist:
- A Raspberry Pi (any model that supports remote desktop services)
- Raspberry Pi OS installed on your Pi
- A Windows 10 computer with internet access
- A stable internet connection for both devices
- The Raspberry Pi’s IP address (we’ll cover how to find this later)
- A remote desktop client installed on your Windows 10 machine
Once you’ve got all these ducks in a row, you’re ready to rock and roll. Let’s move on to the next step!
Understanding Remote Desktop Technology
Remote desktop technology allows you to connect to one computer from another, giving you full control over the remote machine as if you were sitting right in front of it. For our purposes, we’ll be using the Remote Desktop Protocol (RDP) to connect to your Raspberry Pi from Windows 10. This protocol is widely used and supported by many devices, making it a reliable choice for remote access.
Here’s a quick breakdown of how RDP works:
- Client-Server Model: Your Windows 10 computer acts as the client, while your Raspberry Pi serves as the server.
- Encryption: RDP uses encryption to ensure that your connection is secure and your data remains private.
- Low Bandwidth: Even with a less-than-ideal internet connection, RDP can still provide a smooth experience thanks to its efficient use of bandwidth.
Now that you understand the basics, let’s dive into the setup process!
Setting Up Your Raspberry Pi for Remote Access
The first step in remotely accessing your Raspberry Pi is preparing the Pi itself. Here’s how you can do it:
Read also:Shemar Moores Wife The Inside Story Yoursquove Been Waiting For
Enabling VNC and SSH
VNC (Virtual Network Computing) and SSH (Secure Shell) are two essential tools for remote access. While VNC allows you to access the graphical desktop environment, SSH enables command-line access. Both are useful, so let’s enable them:
- Boot up your Raspberry Pi and log in to the desktop environment.
- Go to the main menu and select Preferences > Raspberry Pi Configuration.
- Under the Interfaces tab, enable both VNC and SSH.
- Reboot your Pi to apply the changes.
With these services enabled, your Pi is now ready to accept remote connections. Let’s move on to the next step!
Configuring Your Network Settings
Next up, you’ll need to configure your network settings to ensure that your Raspberry Pi can be reached from your Windows 10 computer. Here’s what you need to do:
Finding Your Pi’s IP Address
Your Pi’s IP address is crucial because it’s the address you’ll use to connect to it remotely. Here’s how to find it:
- Open the terminal on your Raspberry Pi.
- Type
ifconfigand press Enter. - Look for the
inetaddress under thewlan0oreth0section. This is your Pi’s IP address.
Make a note of this address because you’ll need it later. Now let’s talk about setting up port forwarding.
Setting Up Port Forwarding
If you want to access your Raspberry Pi from outside your local network, you’ll need to set up port forwarding on your router. Here’s how:
- Log in to your router’s admin interface (usually via a web browser).
- Find the port forwarding section (it might be under Advanced Settings or Network Settings).
- Create a new rule to forward port 3389 (the default RDP port) to your Pi’s IP address.
- Save the changes and reboot your router if necessary.
With port forwarding set up, your Pi is now accessible from anywhere in the world. Cool, right?
Installing Remote Desktop Client on Windows 10
Now that your Raspberry Pi is all set up, it’s time to prepare your Windows 10 computer. Here’s how to install a remote desktop client:
Using the Built-in Remote Desktop Client
Windows 10 comes with a built-in Remote Desktop client, so you don’t need to download anything extra. Here’s how to use it:
- Open the Start menu and search for Remote Desktop Connection.
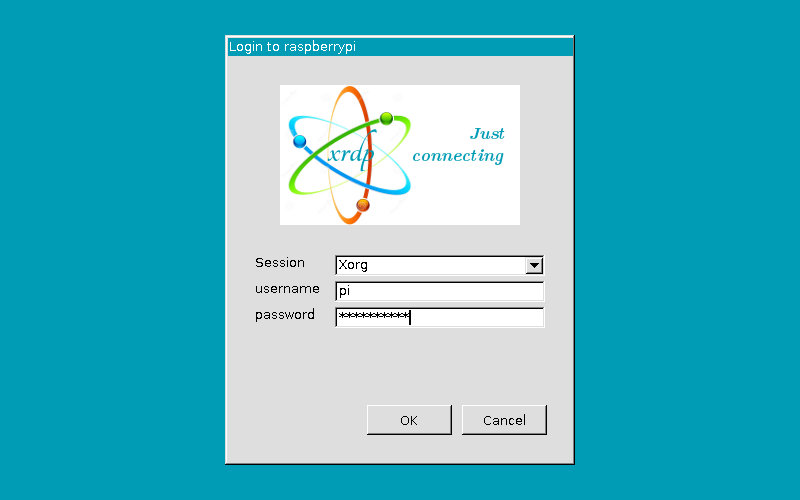
- Enter your Pi’s IP address in the Computer field.
- Click Connect and log in using your Pi’s credentials.
That’s it! You should now see your Raspberry Pi’s desktop environment on your Windows 10 screen.
Troubleshooting Common Issues
Even with the best preparation, things can sometimes go wrong. Here are some common issues and how to fix them:
Connection Timeout
If you’re experiencing connection timeouts, double-check the following:
- Make sure your Pi’s IP address is correct.
- Verify that VNC and SSH are enabled on your Pi.
- Check your router’s port forwarding settings.
Authentication Failed
If you’re getting an authentication error, try the following:
- Ensure you’re using the correct username and password for your Pi.
- Check that your Pi’s firewall isn’t blocking incoming connections.
By addressing these issues, you should be able to get your remote access up and running smoothly.
Enhancing Security for Remote Access
Security is always a top priority when dealing with remote access. Here are some tips to keep your setup secure:
- Use Strong Passwords: Make sure your Pi’s login credentials are strong and unique.
- Enable Two-Factor Authentication: If possible, set up 2FA for an extra layer of security.
- Regularly Update Software: Keep both your Pi’s OS and your Windows 10 machine up to date with the latest security patches.
By following these best practices, you can minimize the risk of unauthorized access and keep your data safe.
Exploring Advanced Features
Once you’ve got the basics down, it’s time to explore some advanced features that can enhance your remote access experience:
Automating Connections
Instead of manually entering your Pi’s IP address every time, you can create a shortcut or script to automate the process. This saves time and reduces the chance of errors.
Using Third-Party Clients
If you’re not satisfied with the built-in Remote Desktop client, there are plenty of third-party options available. Some popular choices include:
- TeamViewer
- AnyDesk
- Chrome Remote Desktop
These tools often offer additional features and better performance, so it’s worth checking them out.
Conclusion
Well, there you have it—a comprehensive guide to remotely accessing your Raspberry Pi’s remote desktop on Windows 10. From setting up your Pi to configuring your network and installing the necessary software, we’ve covered everything you need to know. Remember, the key to a successful remote access setup is preparation and attention to detail.
Now it’s your turn to take action! Try out the steps we’ve outlined and see how remote access can transform the way you work with your Raspberry Pi. If you have any questions or run into issues, feel free to leave a comment below. And don’t forget to share this article with your fellow tech enthusiasts!
Table of Contents
- What You Need Before You Begin
- Understanding Remote Desktop Technology
- Setting Up Your Raspberry Pi for Remote Access
- Configuring Your Network Settings
- Setting Up Port Forwarding
- Installing Remote Desktop Client on Windows 10
- Troubleshooting Common Issues
- Enhancing Security for Remote Access
- Exploring Advanced Features
- Conclusion
Happy tinkering, and may your remote access adventures be smooth and successful!