Hey there, tech enthusiasts! If you're diving into the world of secure remote connections for IoT devices using SSH on an Ubuntu server, you're in the right place. In today's hyper-connected world, ensuring your IoT devices are secure is not just important—it’s critical. Let's talk about securely connecting remote IoT P2P SSH Ubuntu server setups and how you can do it without losing sleep over potential threats.
Imagine this: You’ve got a bunch of IoT devices scattered across different locations, and you need to manage them from afar. Sure, you could just slap on some basic security measures, but let’s face it—hackers these days are getting smarter. So, how do you make sure your IoT devices stay safe while still allowing seamless communication? That’s where SSH comes in. SSH isn’t just another tech buzzword; it’s your golden ticket to secure communication.
This guide is packed with actionable tips, step-by-step instructions, and expert advice to help you set up a secure connection between your remote IoT devices and your Ubuntu server using P2P SSH. Whether you're a seasoned pro or just starting out, we’ve got you covered. Let’s dive in and make your IoT setup as secure as Fort Knox!
Read also:Elizabeth Brasfield Carter The Untold Story Of A Remarkable Woman
Table of Contents
- What is SSH and Why Does It Matter?
- IoT P2P Connections: A Quick Overview
- Setting Up Your Ubuntu Server for IoT
- Securing Your SSH Connection
- Establishing a Remote Connection
- Best Practices for Secure IoT P2P SSH
- Common Issues and How to Fix Them
- Tools You Need for a Secure Setup
- Data Security in IoT P2P SSH
- Wrapping It All Up
What is SSH and Why Does It Matter?
SSH stands for Secure Shell, and it’s basically your go-to protocol for secure communication between devices over a network. It’s like having a secret handshake that only you and your devices know. Without SSH, your data could be floating around in plain text, making it super easy for hackers to intercept. Nobody wants that, right?
SSH creates an encrypted tunnel between your local machine and a remote server, ensuring that all data transmitted is protected from prying eyes. For IoT devices, this is crucial because they often handle sensitive information, from personal data to operational metrics. By using SSH, you’re not just securing your devices; you’re safeguarding your entire network.
Why SSH is Essential for IoT
- Encryption: All data is encrypted during transmission.
- Authentication: Ensures only authorized users can access your devices.
- Integrity: Prevents data tampering during transfer.
So, whether you’re managing a smart home or an entire fleet of industrial sensors, SSH is your best bet for keeping things secure.
IoT P2P Connections: A Quick Overview
Peer-to-peer (P2P) connections in IoT allow devices to communicate directly with each other without relying on a central server. Think of it like a group chat where everyone talks directly instead of going through a moderator. This setup can significantly reduce latency and improve efficiency, especially for time-sensitive applications.
However, P2P connections come with their own set of security challenges. Since devices are communicating directly, there’s a higher risk of unauthorized access if proper security measures aren’t in place. That’s why combining P2P with SSH is a game-changer. It ensures that even in a decentralized setup, your data remains secure.
Benefits of IoT P2P with SSH
- Reduced latency for faster communication.
- Enhanced security through encrypted connections.
- Scalability for large-scale IoT deployments.
With SSH protecting your P2P connections, you can focus on innovation rather than worrying about security breaches.
Read also:Dave Franco Age The Journey Of A Hollywood Heartthrob
Setting Up Your Ubuntu Server for IoT
Ubuntu is one of the most popular Linux distributions for server environments, and for good reason. It’s reliable, secure, and easy to configure for IoT setups. Let’s walk through the steps to set up your Ubuntu server for secure IoT P2P SSH connections.
Step 1: Install Ubuntu Server
Start by downloading the latest version of Ubuntu Server from the official website and installing it on your server. Make sure your server meets the minimum hardware requirements for optimal performance.
Step 2: Update Your System
Once installed, update your system to ensure you have the latest security patches and software versions. Open your terminal and run:
sudo apt update && sudo apt upgrade
Step 3: Install SSH
SSH is usually pre-installed on Ubuntu, but if it’s not, you can install it using:
sudo apt install openssh-server
That’s it! Your Ubuntu server is now ready to handle secure IoT P2P SSH connections.
Securing Your SSH Connection
While SSH is inherently secure, there are additional steps you can take to fortify your setup. Think of it like adding extra locks to your front door—it’s always better to be safe than sorry.
1. Change Default SSH Port
By default, SSH runs on port 22. Hackers know this, so changing it to a non-standard port can deter automated attacks. Edit your SSH config file:
sudo nano /etc/ssh/sshd_config
Change the Port line to something like 2222, then restart the SSH service:
sudo systemctl restart ssh
2. Disable Root Login
Allowing root login via SSH is a big no-no. Instead, create a regular user account and use sudo privileges when needed. To disable root login:
sudo nano /etc/ssh/sshd_config
Set PermitRootLogin to no, save the file, and restart SSH.
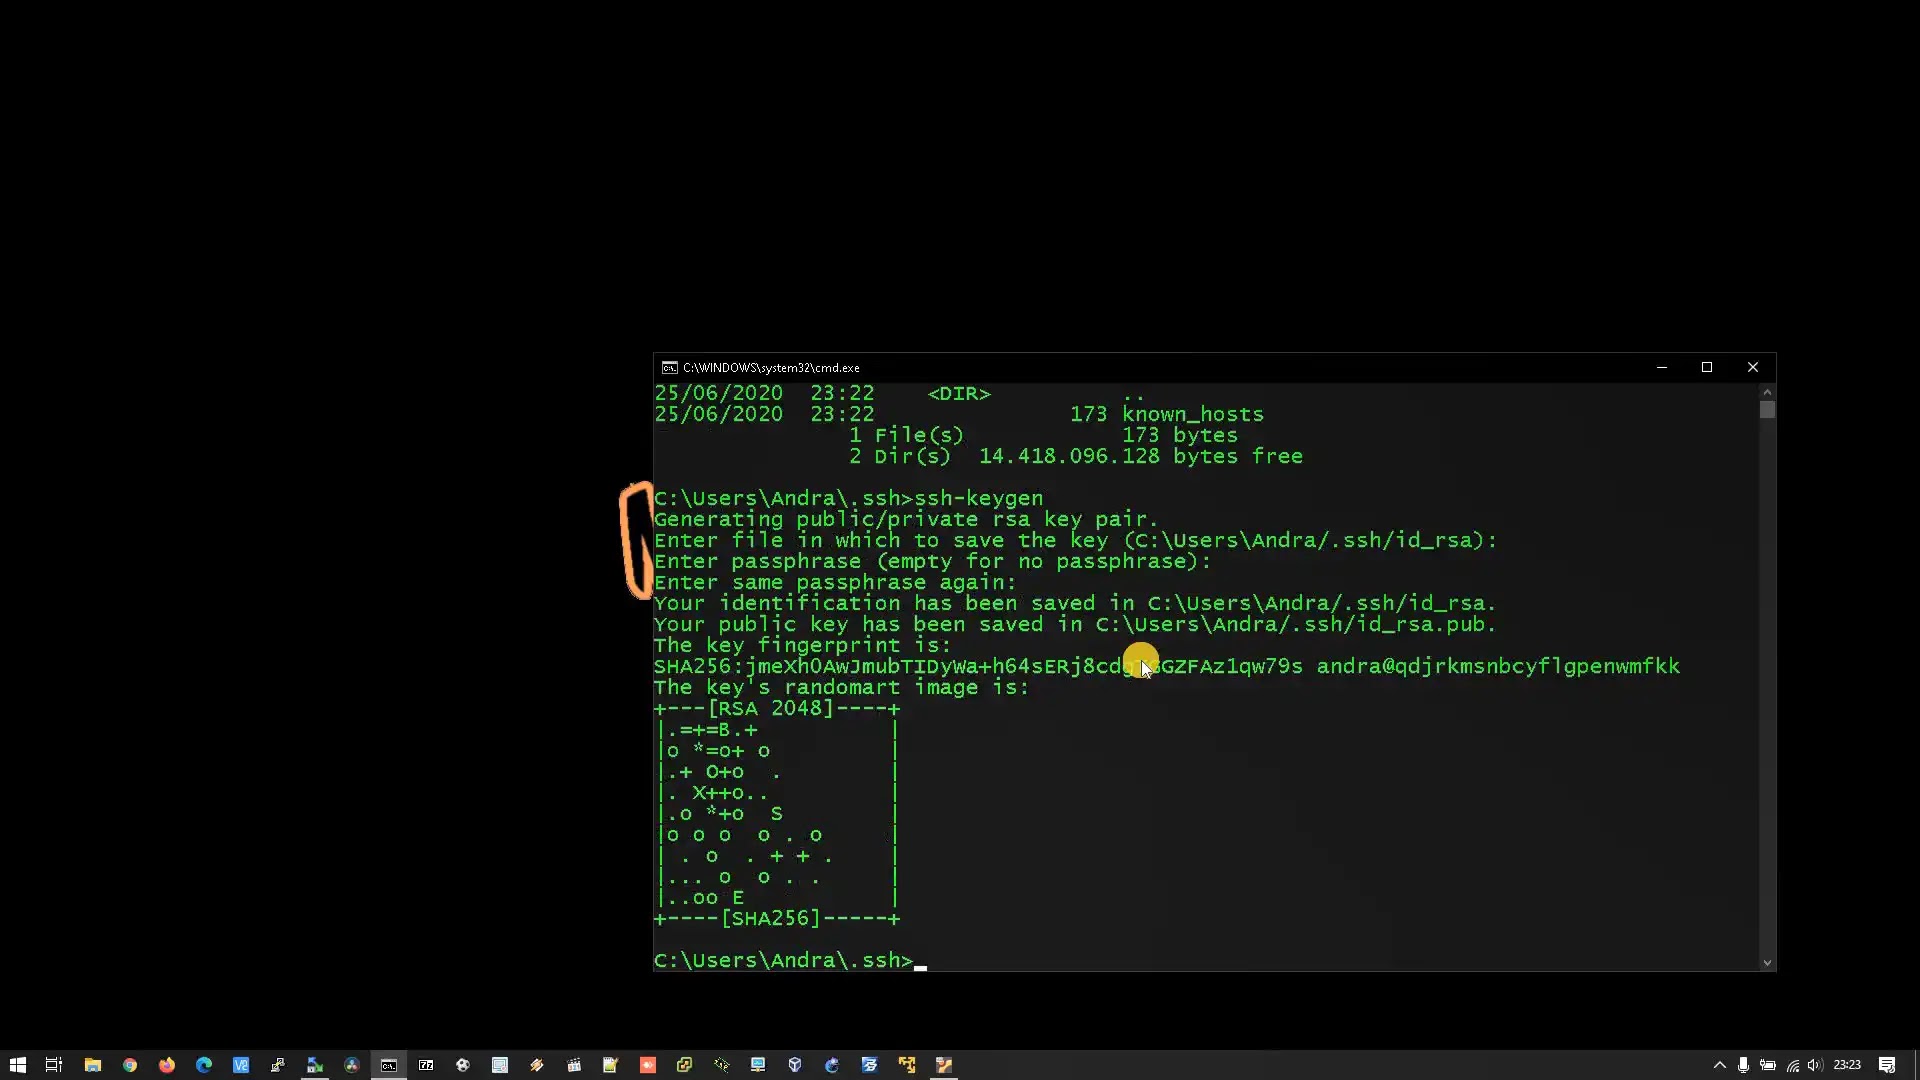
3. Use Key-Based Authentication
Passwords are vulnerable to brute-force attacks. Key-based authentication is much more secure. Generate a key pair on your local machine:
ssh-keygen -t rsa
Then, copy your public key to the server:
ssh-copy-id username@server_ip
Now, you can log in using your private key instead of a password.
Establishing a Remote Connection
With your server set up and SSH secured, it’s time to establish a remote connection. This is where the magic happens—connecting to your IoT devices from anywhere in the world.
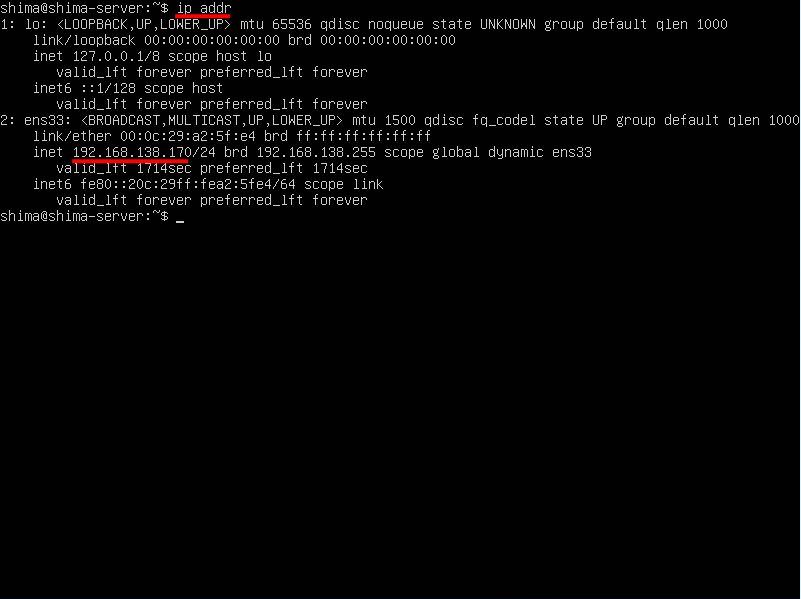
Step 1: Connect to Your Server
Open your terminal and use the ssh command:
ssh username@server_ip -p your_port_number
Replace username, server_ip, and your_port_number with your actual details.
Step 2: Configure IoT Devices
Each IoT device should have SSH installed and properly configured. You can then connect to them individually or set up a P2P network for seamless communication.
Step 3: Test the Connection
Once connected, test the communication between your server and IoT devices. Use simple commands like ping or ssh to ensure everything is working as expected.
Best Practices for Secure IoT P2P SSH
Here are some best practices to keep your IoT P2P SSH setup as secure as possible:
- Regularly update your server and devices to patch vulnerabilities.
- Monitor logs for suspicious activity and set up alerts for unusual behavior.
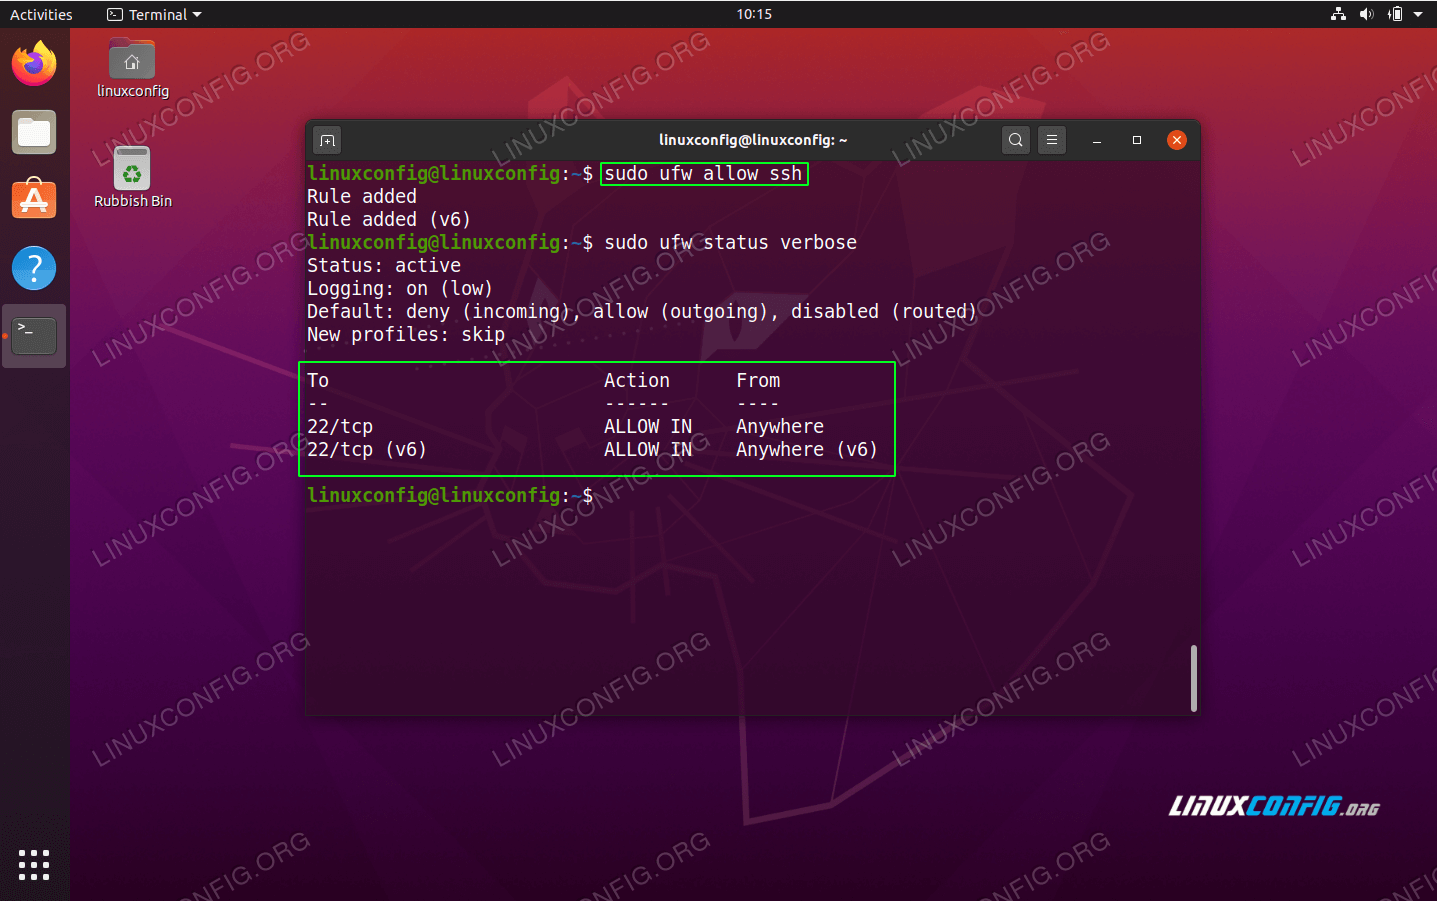
- Use firewalls to restrict access to only necessary ports and IPs.
- Implement intrusion detection systems (IDS) for added security.
Following these practices will help you stay one step ahead of potential threats.
Common Issues and How to Fix Them
Even with the best setup, issues can arise. Here are some common problems and their solutions:
1. Connection Refused
This usually happens if the SSH service isn’t running or the port is blocked. Check the SSH status:
sudo systemctl status ssh
Ensure the port isn’t blocked by your firewall.
2. Authentication Failed
If you’re getting authentication errors, double-check your username, password, or key. Ensure your public key is correctly added to the authorized_keys file on the server.
3. Slow Connection
Network issues or resource constraints can slow down your connection. Optimize your server’s resources and ensure a stable internet connection.
Tools You Need for a Secure Setup
Here are some tools that can help you secure your IoT P2P SSH setup:
- Fail2Ban: Prevents brute-force attacks by banning IPs after multiple failed login attempts.
- ufw (Uncomplicated Firewall): Easy-to-use firewall for securing your server.
- Logwatch: Analyzes system logs and provides detailed reports.
Investing in these tools can save you a lot of headaches down the line.
Data Security in IoT P2P SSH
Data security is at the heart of any IoT setup. Ensuring that your data remains confidential, intact, and available is paramount. Here are some tips to enhance data security:
- Encrypt sensitive data both at rest and in transit.
- Implement access controls to restrict who can view or modify data.
- Regularly back up your data to prevent loss in case of a breach.
By following these guidelines, you can create a robust data security framework for your IoT P2P SSH setup.
Wrapping It All Up
Securing your remote IoT P2P SSH Ubuntu server might seem like a daunting task, but with the right knowledge and tools, it’s entirely achievable. From setting up your server to implementing best practices, every step you take brings you closer to a secure and efficient IoT setup.
So, what’s next? Take action! Start by securing your SSH connections, optimizing your server, and implementing the best practices we’ve discussed. And don’t forget to share your experiences and tips in the comments below. Together, we can build a safer and smarter IoT ecosystem.
Stay secure, stay connected, and keep innovating!