Ever wondered how to iron on patches like a pro? Well, you're about to learn the secrets behind this super easy and stylish craft. Iron-on patches are more than just fabric pieces—they’re a way to express your creativity, personalize your clothes, and even breathe new life into old garments. Whether you're customizing a jacket, fixing a hole, or just adding flair, this guide has got you covered.
Let's be real, iron-on patches have been around for ages, but they’ve made a serious comeback in recent years. From hipster fashionistas to DIY enthusiasts, everyone’s jumping on this trend. But don’t worry if you’ve never done it before—we’ve got all the tips and tricks to make sure your first patching experience is a success.
Before we dive in, here’s the deal: iron-on patches are super simple to apply, but there are a few things you need to know to avoid any mistakes. Trust us, nobody wants to ruin their favorite hoodie or end up with a patch that falls off after one wash. So stick around, and we’ll show you exactly how to iron on patches like a boss.
Read also:Menacing And Meaningful The Ultimate Guide To Arm Tattoos For Men
What You'll Need to Get Started
First things first, you’ll need the right tools to make this project a breeze. Don’t worry, it’s not rocket science—you probably already have most of these lying around your house. Here’s what you’ll need:
- Iron-on patches (obviously!)
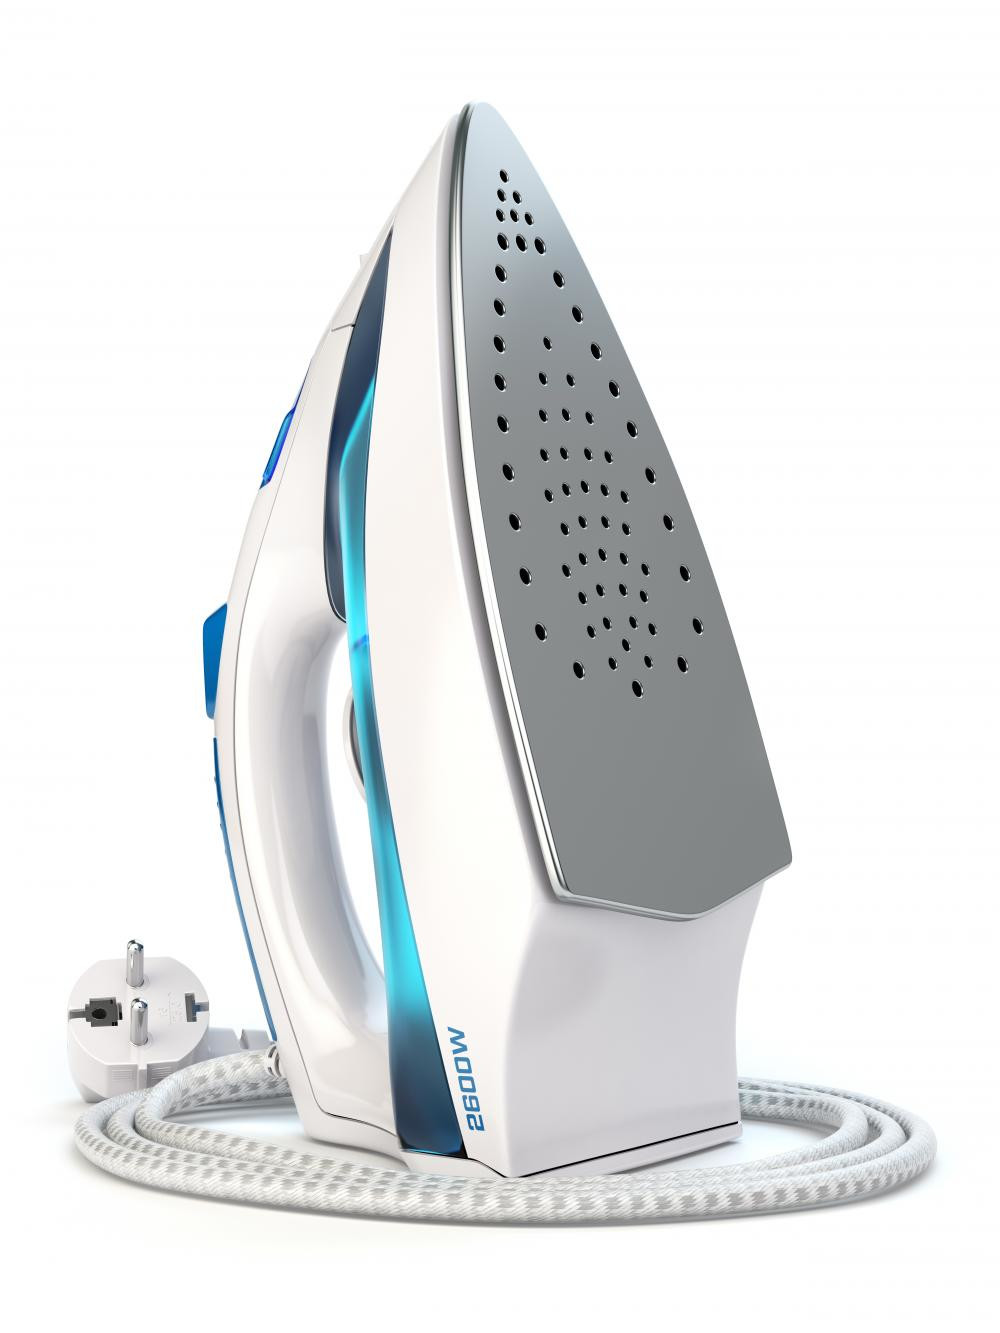
- A trusty iron (preferably one with adjustable heat settings)
- A clean, flat surface (like a table or ironing board)
- A thin cloth or towel (to protect your fabric)
- Scissors (if you need to trim the patch)
Now, some people like to use additional tools like fabric glue or heat-activated adhesive sheets for extra security, but that’s totally up to you. For most basic projects, the list above should suffice.
Why Iron-On Patches Are a Game Changer
Let’s talk about why iron-on patches are such a big deal. In today’s world, where fast fashion reigns supreme, customization is key. Iron-on patches allow you to:
- Add a personal touch to your wardrobe
- Repair damaged clothes without spending a fortune
- Experiment with different styles and trends
- Support sustainable fashion by upcycling old garments
Plus, they’re super versatile. You can put them on jackets, backpacks, jeans, hats—you name it. And the best part? They’re affordable, so you can stock up without breaking the bank.
Step-by-Step Guide: How to Iron On Patches
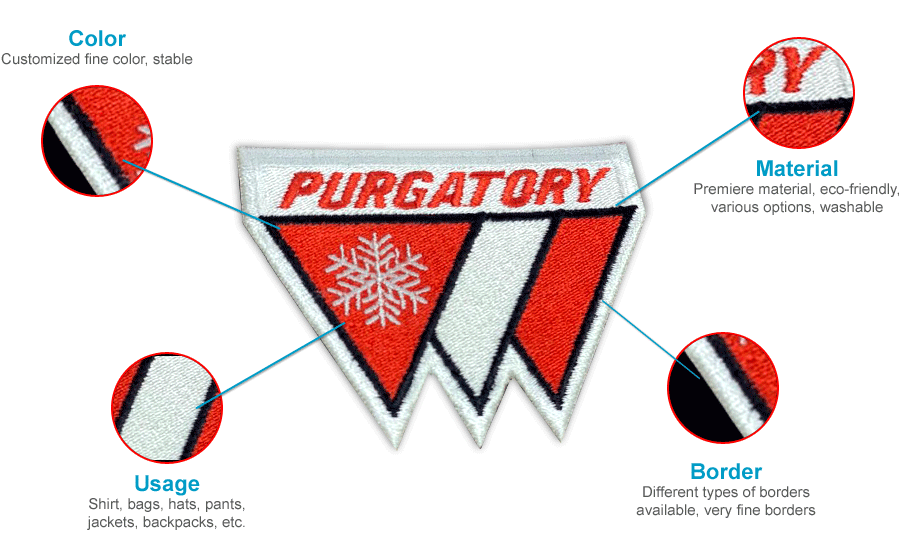
Step 1: Choose the Right Patch
This is where the fun begins! There are tons of iron-on patches out there, from cute animals to bold geometric patterns. Make sure you pick a patch that fits your style and the garment you’re working on. Pro tip: If you’re unsure, go for something neutral that can complement any outfit.
Step 2: Prep Your Garment
Before you start ironing, make sure your garment is clean and wrinkle-free. You don’t want any dirt or lint getting in the way of your masterpiece. Lay it flat on your ironing surface, and smooth out any bumps or folds.
Read also:Crab In Spanish A Deep Dive Into The World Of Crabs And Their Linguistic Charm
Step 3: Position the Patch
Now, place your patch where you want it to go. Take your time with this step—it’s crucial to get the placement right. Once you’re happy with the position, gently press the patch down to keep it in place.
Step 4: Heat It Up
Set your iron to the appropriate temperature. Most iron-on patches require a medium to high heat setting, but always check the instructions on the patch packaging. Avoid using steam—dry heat works best for this process.
Step 5: Iron Away
Place your iron directly on the patch and apply firm pressure. Move it in a circular motion for about 20-30 seconds. If you’re working on a delicate fabric, place a thin cloth over the patch to prevent any damage.
Step 6: Flip and Repeat
Once you’ve ironed the front side, flip your garment over and iron the back for another 20-30 seconds. This ensures the patch is securely attached. Trust us, this extra step makes all the difference.
Step 7: Let It Cool
Let your garment cool down completely before handling it. This helps the adhesive set properly. After it’s cooled, gently peel off the backing paper if your patch has one.
Step 8: Admire Your Work
And there you have it—your very own customized piece! Show it off to your friends and family, and don’t forget to take a selfie for the ‘gram.
Tips and Tricks for Perfect Iron-On Patches
Here are a few extra tips to ensure your iron-on patching adventure goes smoothly:
- Test the patch on a small, inconspicuous area first to avoid any surprises.
- Use a pressing cloth for delicate fabrics to prevent scorching.
- Consider using fabric glue for added security, especially if the patch will be subjected to heavy wear.
- Wash your garment inside out to prolong the life of the patch.
And remember, practice makes perfect. The more you experiment with different patches and garments, the better you’ll get at it.
Common Mistakes to Avoid
Even the best of us make mistakes sometimes, but don’t worry—we’ve got your back. Here are a few common pitfalls to watch out for:
- Using steam: This can weaken the adhesive and ruin your patch.
- Not ironing long enough: Make sure you follow the recommended time to ensure the patch sticks properly.
- Ironing on incompatible fabrics: Some fabrics just don’t play well with iron-on patches. Always check the label!
By avoiding these mistakes, you’ll save yourself a lot of frustration and end up with a perfect patch every time.
Where to Buy Iron-On Patches
So where can you find these magical little pieces of fabric? Here are a few options:
- Craft stores: Your local craft store is a great place to start. They usually have a wide selection of patches in various designs and sizes.
- Online retailers: Websites like Etsy and Amazon offer tons of unique patches from independent designers.
- Thrift stores: Believe it or not, you can sometimes find vintage patches at thrift stores for a fraction of the cost.
Just make sure to read reviews and check the quality before making a purchase. You want your patches to last, right?
How to Care for Your Iron-On Patches
Now that you’ve mastered the art of iron-on patches, it’s important to know how to take care of them. Here’s a quick guide:
- Wash your garments inside out to protect the patch.
- Use cold water and a gentle cycle to avoid damaging the adhesive.
- Avoid using bleach or harsh detergents, as they can fade the colors and weaken the patch.
With proper care, your patches will stay looking fresh for years to come.
Conclusion: Time to Get Patching!
And there you have it—everything you need to know about how to iron on patches. From choosing the right patch to caring for your finished masterpiece, this guide has got you covered. Remember, the key is to have fun and let your creativity shine.
So what are you waiting for? Grab your iron, pick out your favorite patch, and get started. Don’t forget to share your creations with us in the comments below—we’d love to see what you come up with. Happy patching!
Table of Contents
- How to Iron On Patches: A Beginner's Guide to Adding Style with Ease
- What You'll Need to Get Started
- Why Iron-On Patches Are a Game Changer
- Step-by-Step Guide: How to Iron On Patches
- Step 1: Choose the Right Patch
- Step 2: Prep Your Garment
- Step 3: Position the Patch
- Step 4: Heat It Up
- Step 5: Iron Away
- Step 6: Flip and Repeat
- Step 7: Let It Cool
- Step 8: Admire Your Work
- Tips and Tricks for Perfect Iron-On Patches
- Common Mistakes to Avoid
- Where to Buy Iron-On Patches
- How to Care for Your Iron-On Patches
- Conclusion: Time to Get Patching!