So, you’re here because you’ve got a thing for pink and white ombre nails, right? Maybe you’ve been scrolling through Instagram or Pinterest and stumbled upon those stunning nail designs that look like a dreamy sunset on your fingertips. Or maybe you’re just looking to spice up your manicure game. Whatever the reason, you’ve landed in the right place, babe! Today, we’re diving deep into the world of pink and white ombre nails, breaking it down step by step so you can rock this look like a total pro.
Now, let’s talk real talk for a sec. Pink and white ombre nails are not just a trend; they’re a lifestyle. This nail art combines two of the most classic and chic colors—pink and white—into a seamless gradient that’s soft, feminine, and totally Instagram-worthy. Whether you’re into subtle designs or bold statements, this nail art has got you covered.
Before we dive into the nitty-gritty, let me just say this: if you’re ready to level up your nail game, then pink and white ombre nails are the way to go. So grab your nail polish, your favorite playlist, and let’s get started. Trust me, by the end of this article, you’ll be scheduling your next nail appointment or DIY-ing your way to nail perfection!
Read also:Theres A Woman In A Boat Riddle A Mindblowing Puzzle That Will Test Your Wits
Why Pink and White Ombre Nails Are the Hottest Trend
Let’s face it, trends come and go, but pink and white ombre nails have staying power. They’ve been around for a while now, and for good reason. This nail art is versatile, timeless, and absolutely gorgeous. It’s the perfect blend of sophistication and playfulness, making it a favorite among nail enthusiasts everywhere.
Here’s why pink and white ombre nails are so popular:
- They’re versatile. Whether you’re going for a natural look or something more dramatic, this design can be customized to fit your style.
- They’re timeless. Unlike some trends that fade away quickly, pink and white ombre nails have a classic appeal that never goes out of style.
- They’re Instagram-worthy. Let’s be honest, who doesn’t love a good nail pic? This design is perfect for those who love to share their beauty routines online.
How to Choose the Right Pink and White Shades
Not all pinks and whites are created equal, and when it comes to ombre nails, choosing the right shades is crucial. You want colors that complement each other and create a smooth gradient. Here are some tips to help you pick the perfect shades:
- Start with a base color. Choose a soft white or cream shade as your base. This will give your nails a clean and polished look.
- Add a touch of pink. For the pink, go for a shade that’s not too bright but still has a pop of color. Soft pink, blush, or even a dusty rose can work wonders.
- Experiment with different tones. Don’t be afraid to mix and match shades until you find the perfect combination. Sometimes, the unexpected pairings can lead to the best results.
Step-by-Step Guide to Creating Pink and White Ombre Nails
Ready to create your own pink and white ombre nails? Here’s a step-by-step guide to help you achieve that flawless gradient look:
What You’ll Need
Before you start, make sure you have all the necessary tools and materials:
- White nail polish
- Pink nail polish
- A sponge (you can use a makeup sponge or a dedicated nail sponge)
- Cuticle oil
- Topcoat
- Nail polish remover
Step 1: Prep Your Nails
Read also:What Is An Industry Plant Unlocking The Secrets Of Industrial Powerhouses
Start by cleaning your nails and pushing back your cuticles. Apply a base coat to protect your nails from staining. This step is crucial, so don’t skip it!
Step 2: Apply the Base Color
Using your white nail polish, apply a thin layer to each nail. This will serve as the foundation for your ombre design. Let it dry completely before moving on to the next step.
Step 3: Create the Gradient
Now comes the fun part! Dip your sponge into the pink nail polish and gently dab it onto your nails, starting from the tip and working your way down. Repeat this process until you achieve the desired gradient effect. Don’t worry if it’s not perfect the first time—you can always adjust as you go.
Step 4: Seal the Deal
Once you’re happy with your gradient, apply a topcoat to seal everything in place. This will give your nails a shiny, professional finish and help them last longer.
Common Mistakes to Avoid
Even the best nail artists make mistakes sometimes, but with a little practice, you can avoid these common pitfalls:
- Using too much polish. When creating the gradient, less is more. Start with a light hand and build up the color gradually.
- Not letting each layer dry. If you rush the process, you might end up smudging your design. Patience is key!
- Forgetting the topcoat. A good topcoat not only protects your nails but also enhances the overall look of your design.
Pro Tips for Perfect Pink and White Ombre Nails
Here are some pro tips to take your pink and white ombre nails to the next level:
Tip 1: Use a Nail Art Brush
If you want a more precise gradient, consider using a nail art brush. This will give you more control over where the colors blend and help you achieve a smoother transition.
Tip 2: Add Sparkle
Why stop at pink and white? Add a touch of glitter or shimmer to your nails for an extra pop of sparkle. Just make sure it’s not too overwhelming—you want the gradient to be the star of the show.
Tip 3: Experiment with Shapes
Don’t be afraid to play around with different nail shapes. From classic almond to trendy coffin, there’s no limit to what you can do with pink and white ombre nails.
Popular Variations of Pink and White Ombre Nails
While the classic pink and white ombre design is always a safe bet, there are plenty of variations to keep things interesting:
1. Pastel Ombre
For a softer look, try using pastel shades of pink and white. This variation is perfect for spring and summer.
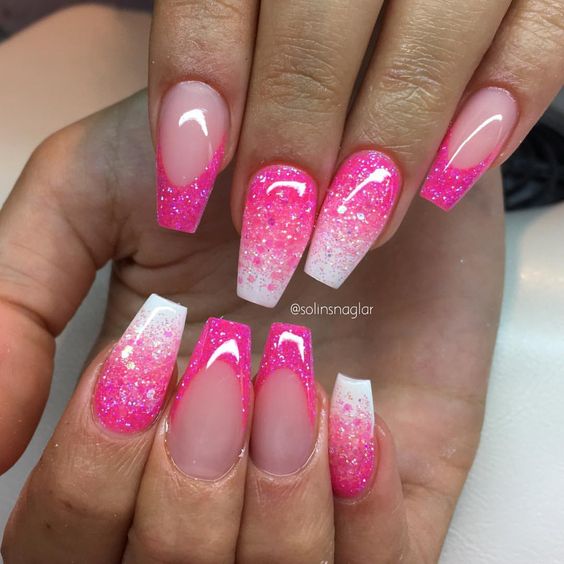
2. Glitter Accents
Add a touch of sparkle by incorporating glitter into your design. This can be done by applying a clear glitter polish over the ombre or adding glitter accents to specific nails.
3. French Tip Ombre
Combine the classic French tip with an ombre gradient for a unique twist on a timeless look.
Where to Get Pink and White Ombre Nails Done
If DIY isn’t your thing, there are plenty of nail salons that offer pink and white ombre nail services. When choosing a salon, make sure to do your research and read reviews to ensure you’re getting quality service. And don’t forget to check out their social media pages for inspiration!
Conclusion: Rock Those Pink and White Ombre Nails
So there you have it, everything you need to know about pink and white ombre nails. Whether you’re doing it yourself or visiting a professional, this design is sure to turn heads and make you feel like a million bucks. Remember, practice makes perfect, so don’t be afraid to experiment and find what works best for you.
Now it’s your turn! Share your thoughts in the comments below. Did you try this look? What variations did you come up with? And don’t forget to follow us for more beauty tips and trends. Happy nailing, babe!
Table of Contents
- Why Pink and White Ombre Nails Are the Hottest Trend
- How to Choose the Right Pink and White Shades
- Step-by-Step Guide to Creating Pink and White Ombre Nails
- What You’ll Need
- Step 1: Prep Your Nails
- Step 2: Apply the Base Color
- Step 3: Create the Gradient
- Step 4: Seal the Deal
- Common Mistakes to Avoid
- Pro Tips for Perfect Pink and White Ombre Nails
- Popular Variations of Pink and White Ombre Nails
- Where to Get Pink and White Ombre Nails Done